Articles · 2026-08-25
How to set up a job table
Some jobs carry a list: every weld on a spool, or every test point on a vessel. A job table holds that list in Stratum Track. Your office types it in once when the job is created, and every step that needs it takes its rows from there, so the same weld number is never typed twice.
This guide sets up a weld register and points a step at it. It takes about fifteen minutes.
What you need
- A manager login.
- A form with a step that should have one row per item on the list.
Step 1: Open Job Tables
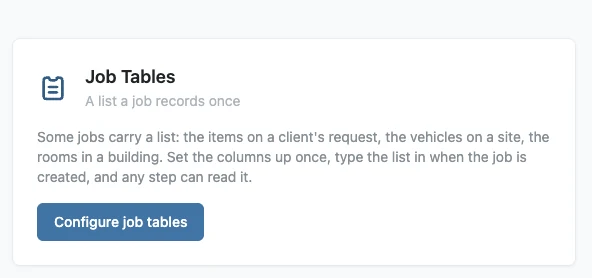
Go to Settings and press Job Tables, under Job Data. You can also type "job tables" into Find a setting at the top of the page.
Step 2: Create the table
Press New table and name it after the list it holds. The description is the line your team reads under the heading when they fill it in.
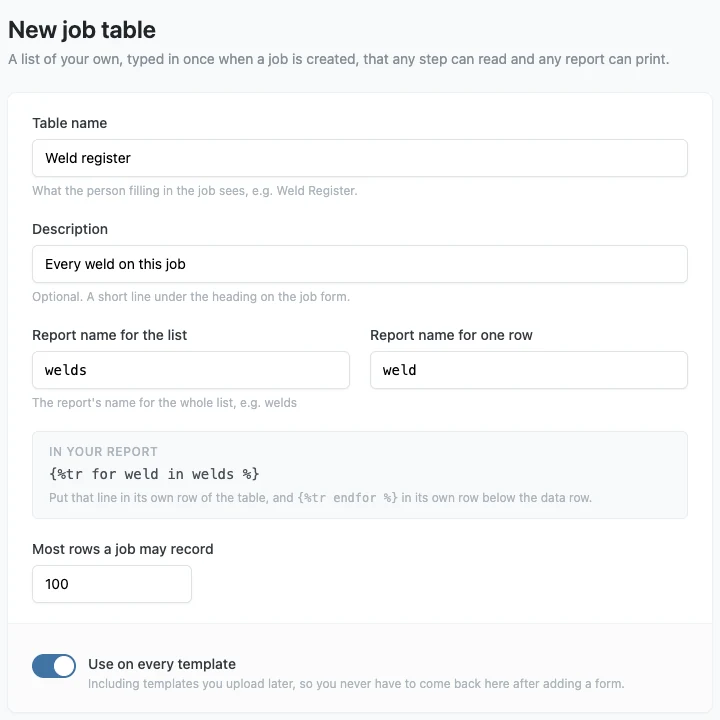
If you print the list in a report, Report name for the list names the whole list and Report name for one row names a single row, so the line in your Word document reads the way you would say it: for a list of welds, welds and weld. Stratum Track shows you that line as you type. Most rows a job may record is an upper limit.
Leave Use on every template on and the list appears on every job, including forms you add later. Switch it off and you pick the forms it belongs to.
Step 3: Add the columns
Add one column for each thing the list records. Choose what each one holds, add a line of help text if the name is not enough, and tick Required when a job is created for the ones a job cannot go ahead without.
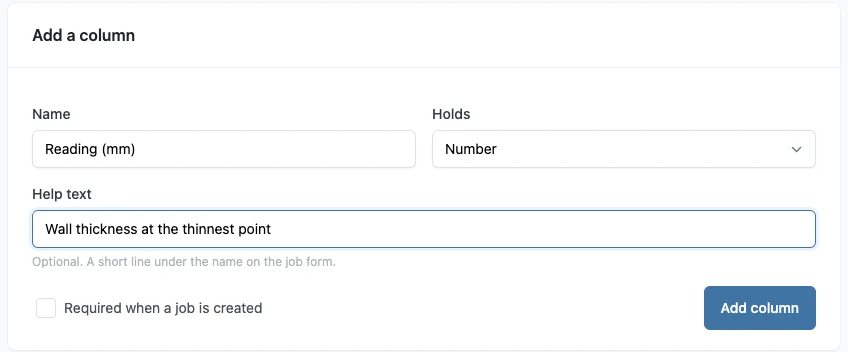
Names can change later. The reference beside each one cannot, because your report prints it.
Step 4: Fill the list in on a job
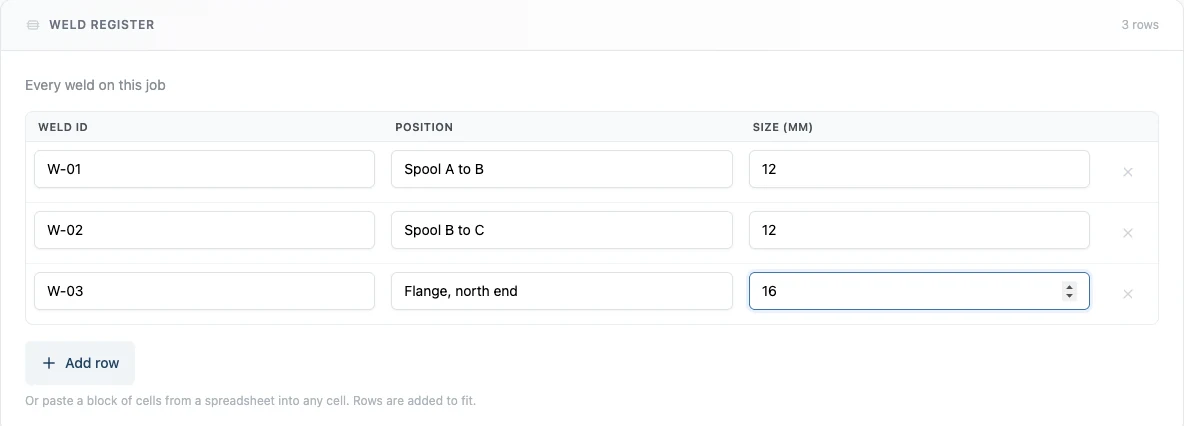
The table now appears on the create and edit job forms. Your office types the list in once, or pastes a block of cells straight out of a spreadsheet and Stratum Track fills the table from that cell down, adding rows to fit. On a repeat job started with Clone with Data, Stratum Track copies the last job's list onto the form, ready to change.
Step 5: Point a step at the list
Go to Templates, open the form with Actions, then Review. It opens on the Preview tab.
Switch to the Structure tab, find the table on the step and press Allow extra rows. A step table starts with one row, and this control lets it hold as many as the job needs. On a form that already has jobs, Stratum Track refuses with "This template already has jobs. Convert a copy of the template instead."

Switch to the Preview tab, click the table, and set Rows come from to your job table, then press Save changes.
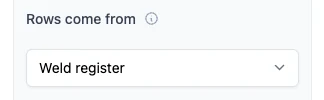
Step 6: Carry the columns across
Click a cell in the table, then Carry from the job, and choose which column of the list it shows.
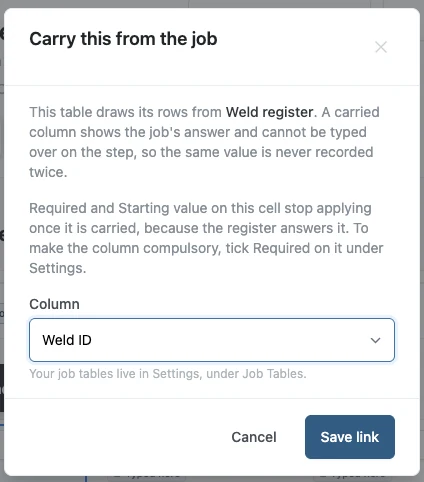
Press Save link and repeat for each column you want carried. On a row from the list, a carried cell shows the job's answer and does not accept typing, so the same value is never recorded twice.
Step 7: Check it on a job
Open a job and go to the step. There is one row per row on the list. The carried columns are already filled and greyed, and the columns you left alone are waiting for your technician. The line above the table counts the rows the step is using, because a step can be narrowed to part of the list. Add row under the table lets your technician add a row the list does not have.
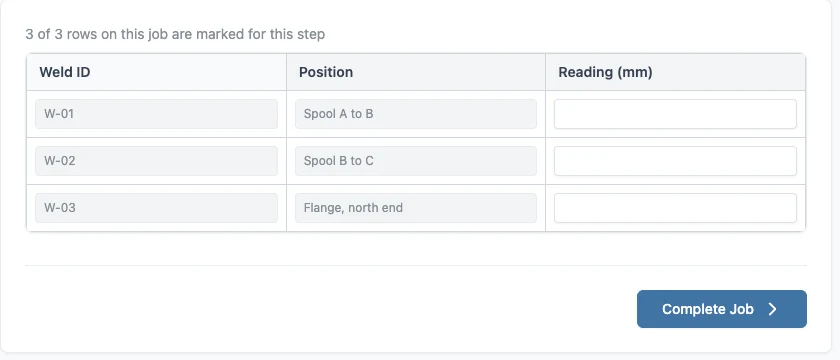
Worth knowing
- The list is recorded once and read everywhere. Two steps pointed at the same job table always agree.
- A row from the list stays as the list has it. Its carried columns do not accept typing on the step, and it can only be removed from the job's list.
- Your technician can add rows on the step. If one weld needs a second exposure, they press Add row. The new row starts with the carried columns of the row above it, and they can change any cell in it.
- Changing the form on a live job saves a draft. Nothing changes for your team until you press Activate Template and confirm.
Common questions
Can I paste the list out of a spreadsheet?
Yes. On the create or edit job form, paste a block of cells from your spreadsheet into a cell of the table, and Stratum Track fills the table from that cell down, adding rows to fit, and tells you how many it pasted. Check that every column you ticked as Required when a job is created is filled in, because a job cannot be created with one of them empty, and keep the list within the most rows the table allows.
Can two different steps use the same list?
Yes. Set Rows come from on each step's table to the same job table, and each step gets one row per row on the list, with its carried columns filled from the job. The list is recorded once, on the job, so the two steps always agree about it, and when you edit the list on the job both steps follow it.
What happens if the list changes after work has started?
Edit the job and change the list, and the steps follow it. If your team has already recorded results against a row, Stratum Track refuses to remove that row from the list. It names the step that holds the results and changes nothing until they are cleared. If a step uses only part of the list and a row with results stops matching it, the row stays on the step under the line "This item is no longer marked for this step. Remove it, or tick it again on the job."
Why can I not press Allow extra rows on my step's table?
If the table already takes extra rows, the button is replaced by On. Otherwise Stratum Track shows a message saying why it refused. The usual reasons are that the form already has jobs, so the change belongs on a copy of the form, that the table starts with more than one row of answers, or that a cell in it is linked to bearing data or the equipment register, which cannot repeat per row.